For five years Emily Wright stared up her house’s “stomped stalactite ceilings” wishing they’d disappear. Then she came up with an inexpensive solution: DIY beadboard paneling that she and her husband, Shane Pribbel, were able to install themselves over the existing plasterwork.
Emily and Shane live in New Castle, Indiana, and she chronicles their home improvements in her blog Lifestyle and Design Online (currently on hiatus). “Most couples do normal things like go to dinner for quality time,” says Emily. “Not us. We rip apart our kitchen and start over.” Self-taught remodelers—”actually Shane did have a construction job one summer in high school,” says Emily—the two have jointly tackled all of the work in their house themselves, including adding new windows and a new roof (“yes, I actually got up on the roof,” she says) plus a gut renovation of the kitchen.
“We’re both attention-to-details people. We watch a lot of How-To videos on YouTube, then we jump right in.” The ceiling upgrade, Emily reports, was by far the most satisfying of their design solutions.
Photography via Lifestyle and Design Online.
After

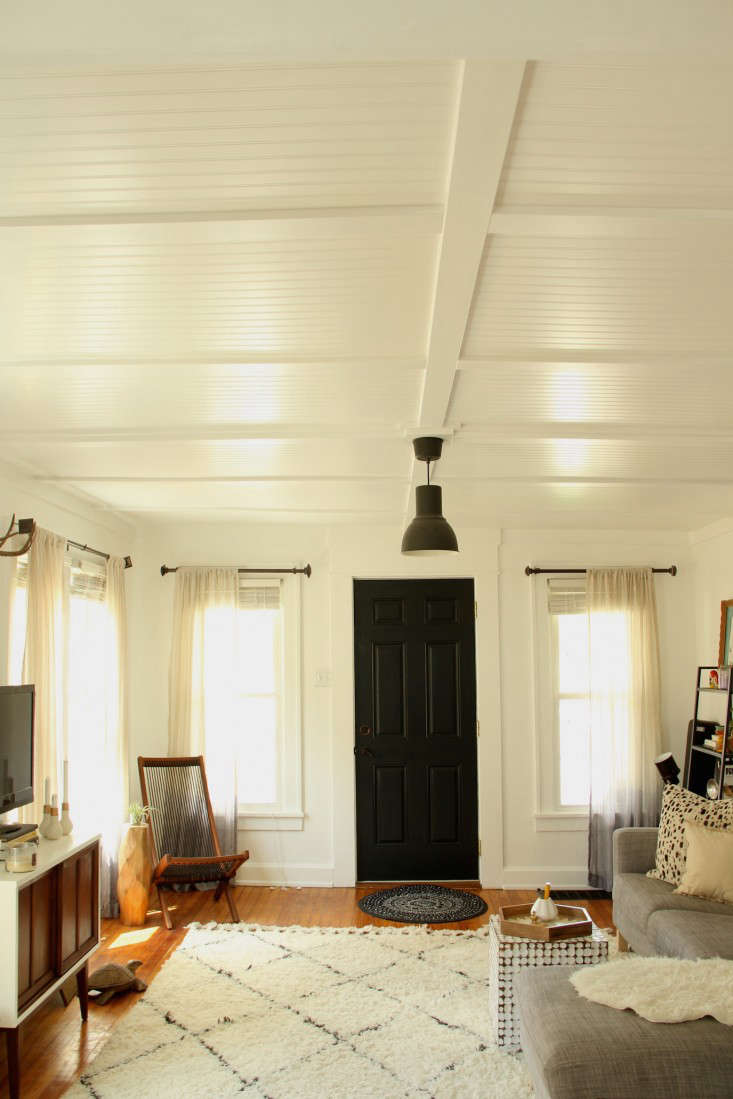

They used four-by-eight-foot sheets of White/Satin Hardboard Panels from Lowe’s that cost $19.98 each. They nailed the premade beadboard directly in place—it holds well thanks to the fact that the existing plaster ceilings are backed with lath board. “Once the panels are up, the ceiling just needs to be trimmed out,” says Emily. For the trim they used one-by-four-foot MDF boards installed in a grid. “Some paint and several tubes of caulk later, and you have a coffered-looking ceiling.”
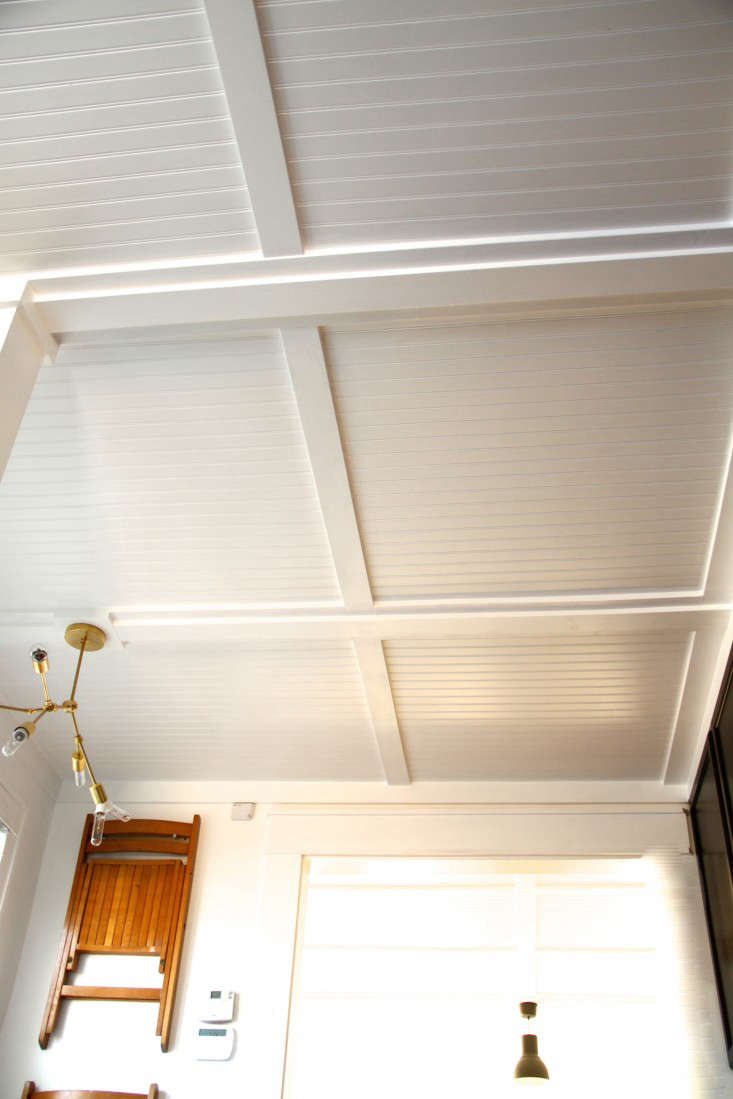
The walls, trim, and ceilings are painted in Valspar Ultra White from Lowe’s. The small dining area has extra chairs cleverly hung on the wall, and a DIY Lindsey Adelman light—have a look at our post, A New $60 DIY Lindsey Adelman Pendant, for a similar (but easier) project.

Writes Emily in her blog: “Our bedroom is an 11-by-15-foot rectangle, so the layout was pretty simple: We needed six sheets of four-by-eight beadboard. Then we purchased enough MFD one-by-four boards do the trimming … we measured and used chalk lines to plan out the grid. Since we have a hanging light in the center of the room, we wanted a seam to run through the fixture. We liked the idea of the light being on the ‘beams’.” Read Emily’s full report on the ceiling project at Lifestyle and Design Online.
Before


Shown above is a section of the dining room that Emily describes as “really not so terrible in comparison to other spots that I wish I had photographed.”
N.B.: This post is an update; the original story ran on May 7, 2014.
Tackling your own place? See The Catskills Farmhouse of Two Brooklyn Creatives, Weekend DIY Edition for a similar beadboard-ceiling DIY. And read up on beadboard, V-groove, shiplap, and other paneling:
- Remodeling 101: The Ultimate Wood Paneling Guide with Jersey Ice Cream Co.
- Expert Advice: The Enduring Appeal of Shiplap
- Expert Advice: How to Use Wood Paneling to Add Loftiness to a Room
Frequently asked questions
What is this article about?
This article is about the before and after transformation of a beadboard ceiling in a renovation project.
What is beadboard?
Beadboard is a type of wall paneling made of narrow, tongue-and-groove boards with a bead or decorative groove in between.
How was the beadboard ceiling installed?
The beadboard ceiling was installed by cutting the panels to size, then nailing them up with a pneumatic nail gun and finishing with trim pieces.
What other changes were made in the renovation project?
Other changes made in the renovation project included adding more windows, replacing flooring, and updating the electrical and lighting systems.
How long did the renovation project take?
The renovation project took approximately four months to complete.
What was the budget for the renovation project?
The budget for the renovation project was approximately $100,000.
What is the style of the renovated space?
The renovated space is designed in a farmhouse style with modern elements.


Have a Question or Comment About This Post?
Join the conversation